Do you want to know how to take a screenshot for windows operating system?
There are a times scenes, pictures or displays that tempt you to take shots of them and use or keep for later use.
You can take screenshot of either the entire desktop screen or opened windows or web interface.
And the best way to get such awesome pictures is to take a screenshot.
In this article, we will show you few simple and easy steps on how to take a screenshot for windows 10.
So, to achieve that, we are taking a look at two different approaches.
The first approach is to use a built in app while the second method is to make use of keyboard shortcuts.
So here we go.
How to take a screenshot for windows 10
The name of the app we want to use is called Snipping Tool and we are going to activate it and use it to take screenshot.
To open snipping tool on windows,
Open search field at the taskbar of the windows desktop and type “snipping tool”
Another way to get at snipping tool is to click on start menu, navigate through the popup list of applications and via accessories to locate Snipping Tool on the menu.
Alternatively, you can press windows logo key +Shift +S on your keyboard to activate the snipping tool.
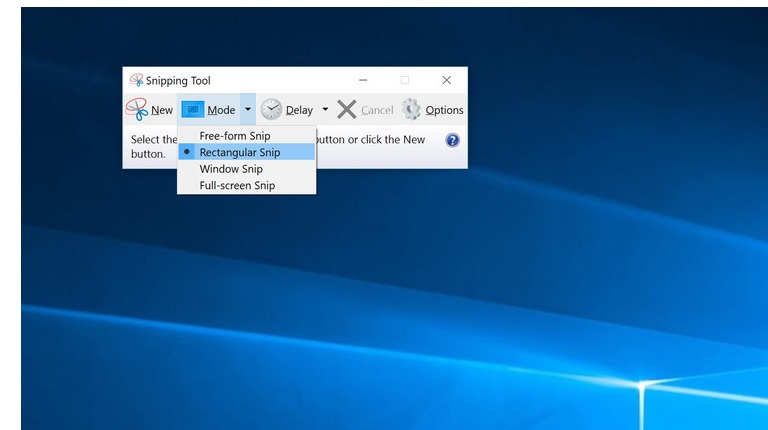
Snipping Tool Modes
Snipping tool has a couple of modes to help you determine how you want to capture the screen.
It has the full –screen snip mode which helps you to screenshot the entire desktop screen
Also, there is a window snip allows you to take a screenshot of just your browser or opened window page.
Then again we have the rectangular snip. This allows you to highlight just a certain portion of the page to screenshot.
And the free-form snip enables you to carve out a particular part of the screen you want to screenshot like you are using free hand tool.
So which ever option you choose, just select it, use the mouse cursor to adjust where you want the screenshot to cover then go to File menu and click save.
Shocking facts about windows 10 Update Assistant
Simple Steps to Fix Windows 10 Black screen problem
10 super Easy Ways to Make Your Computer Faster
But also note that while saving, you can choose any of the file formats such as JPG, PNG etc to save your screenshot file.
Similarly, there is the delay feature that can allow you delay of the screen capture for some varying seconds
The maximum delay option is 5 seconds.
As well, you can use the edit tool to edit the image you have captured.
That is about using the snipping tool to screenshot image for windows.
How to use Shortcut keys to Screenshot for Windows
Let’s now look at the option of using keyboard shortcuts to do a screenshot.
We will make use of the function key and the print screen keys to screen capture our windows screen.
To do that, hold down the fn key and press PrtSc keys and automatically, your screen is captured.
For example, fn+PrtSc keys then you go to any image editor like Paint and paste it.
After pasting, you can adjust, crop and save according to your wish.
I hope this write-up was able to help you to know how to take a screenshot for windows 10.